Sweet Treat Dispenser
Build your own gravity-fed candy machine!
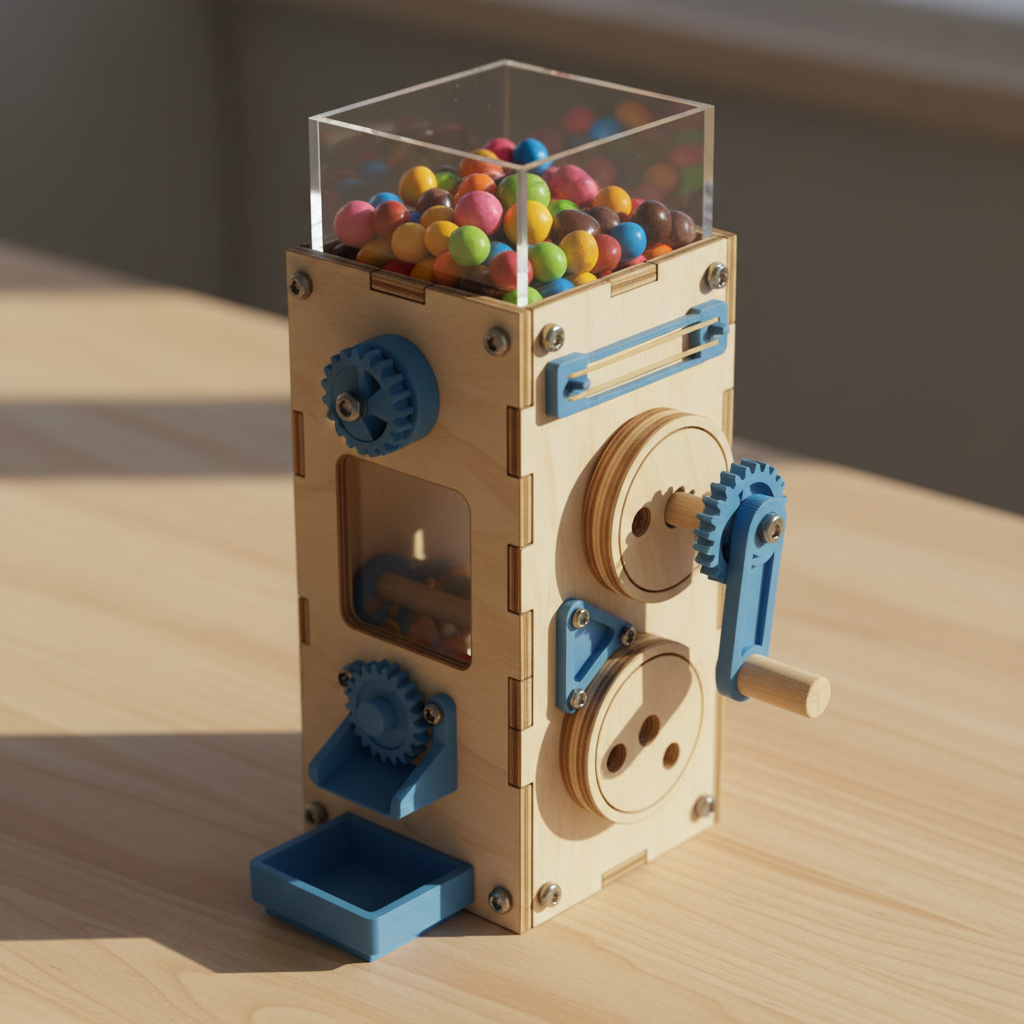
This mechanical candy dispenser uses a sliding gate mechanism to control the flow of small candies or treats. Turn the handle to open the gate and dispense the perfect amount every time!
The Builder's Idea
“candy dispenser”
This kit was designed by AI based on a kid's imagination. Try it with your own idea →
What's in the Kit
Laser-Cut Birchwood
- 1base100mm x 80mm
- 1left-wall80mm x 3.175mm x 120mm
- 1right-wall80mm x 3.175mm x 120mm
- 1back-panel100mm x 3.175mm x 100mm
- 1hopper-bottom80mm x 60mm
- 1gate-disc60mm x 60mm
- 1handle-disc40mm x 40mm
3D-Printed PLA Parts
- 1left-axle-mount20mm x 15mm x 15mm
- 1right-axle-mount20mm x 15mm x 15mm
- 1hopper-bracket-120mm x 15mm x 20mm
- 1hopper-bracket-220mm x 15mm x 20mm
- 1hopper-bracket-320mm x 15mm x 20mm
- 1hopper-bracket-420mm x 15mm x 20mm
- 1dispensing-gate50mm x 30mm x 8mm
- 1candy-chute40mm x 60mm x 15mm
Hardware
- 12M3x10mm socket head cap screwfor brackets and axle mounts
- 6M3x8mm socket head cap screwfor panel connections and chute
- 18M3 hex nutIncluded
- 18M3 flat washerIncluded
- 14mm birch dowel axle100mm length for gate mechanism
- 12.5mm Allen key (for M3 screws)Included
Assembly Instructions
- 1
Step 1: Lay out all wooden panels, 3D-printed blue parts, and hardware. Check that you have everything from the parts list.
- 2
Step 2: Insert the left and right wall panels into the slots on the base plate. Make sure they're fully seated.
- 3
Step 3: Position the back panel between the side walls and secure with M3x8mm screws, nuts, and washers through the corner holes.
- 4
Step 4: Attach the axle mounts to the inside faces of the left and right walls using M3x10mm screws. The axle holes should line up.
- 5
Step 5: Use the four corner brackets to mount the hopper bottom plate horizontally between the walls, about 2/3 up from the base.
- 6
Step 6: Mount the candy chute to the front of the base plate using M3x8mm screws, positioning it to catch dispensed candy.
- 7
Step 7: Slide the 4mm dowel axle through the left axle mount hole.
- 8
Step 8: Press the large gate disc onto the axle, then attach the custom dispensing gate piece.
- 9
Step 9: Continue the axle through the right axle mount and press the handle disc onto the protruding end.
- 10
Step 10: Test the mechanism by turning the handle. The gate should rotate and align its opening with the hopper outlet.
- 11
Step 11: Fill the hopper with small candies or treats through the top opening.
- 12
Step 12: Turn the handle slowly to dispense candy through the chute. Your candy dispenser is ready to use!
How Parts Connect
About This AI-Designed Building Kit
This Sweet Treat Dispenser kit was designed entirely by artificial intelligence based on a young inventor's idea. Every InventShack kit features precision laser-cut 1/8" birchwood plywood panels, custom 3D-printed PLA components, and real M3 socket head cap screws with hex nuts — the same hardware used in real engineering projects.
Unlike mass-produced building kits, this design is one-of-a-kind. The AI selected from a library of parametric component templates — base plates, side panels, wheel discs, axle mounts, rubber band hooks, corner brackets, and more — then configured each part's dimensions to create a working build. All holes align to a 10mm grid system, ensuring every part connects properly.
Perfect for kids ages 8-10 who love building, inventing, and engineering. Whether you have a laser cutter, a 3D printer, or just want to see what AI can design — InventShack turns kids' ideas into real, buildable projects.
Want kits shipped to your door?
We're building a service that ships AI-designed kits with all parts included. Sign up to be notified when we launch.
Have your own invention idea?
Tell the AI what you want to build and get a complete kit designed in seconds — laser-cut wood parts, 3D-printed components, and step-by-step assembly instructions.